
Hello friends!!
It's been a couple crazy weeks around here and then I suddenly realized that school starts in less than a month!!!!! What!?!
So we've been kicking it into high gear around here to try and finish a bunch of projects I had on my summer to do list.
One of which involves having 3 of the rooms in our house painted. Eek!
I'm excited about the finished product but I can't say that I'm excited about packing all of those rooms up to paint them. Ick.
So things are going to be even more chaotic next week when the painters arrive.
Another thing that has caused me to be a bit distracted is that I FINALLY took the plunge and opened an Etsy shop!
Can you believe it??
I've been researching and thinking and thinking some more for over a year.
But I finally just went through with it.
I'll be selling mostly custom made onesies/shirts & children accessories- you didn't know that I was in that world, huh?
If you follow me on Instagram, then you may know that I'm slightly obsessed with fun toddler fashion so I'm just having fun with it right now.
I"ll be adding more items in the next couple months so if you love cute kid clothes & accessories- and adult graphic tees- then you'll love my shop!
I'd love to have you visit it, you'll find it here: Tattered and Inked Etsy Shop
So then, onto the most recent furniture redo.
I recently found several cute coffee tables during my thrifting hunts & I have so many fun ideas for them!
But for this particular one, I had a good friend I was hunting for because they needed something longer & a little more colorful for their new home.
I found this pretty little coffee table while perusing through Goodwill a few months ago & just knew it'd be perfect for them!!


It was the perfect finishing touch to their living room!
I mean, how could you go wrong with adding blue anyways?
What do you think, are you loving the new look?
Like me on Facebook. Follow me on Pinterest. Subscribe to my feed.
It's been a couple crazy weeks around here and then I suddenly realized that school starts in less than a month!!!!! What!?!
So we've been kicking it into high gear around here to try and finish a bunch of projects I had on my summer to do list.
One of which involves having 3 of the rooms in our house painted. Eek!
I'm excited about the finished product but I can't say that I'm excited about packing all of those rooms up to paint them. Ick.
So things are going to be even more chaotic next week when the painters arrive.
Another thing that has caused me to be a bit distracted is that I FINALLY took the plunge and opened an Etsy shop!
Can you believe it??
I've been researching and thinking and thinking some more for over a year.
But I finally just went through with it.
I'll be selling mostly custom made onesies/shirts & children accessories- you didn't know that I was in that world, huh?
If you follow me on Instagram, then you may know that I'm slightly obsessed with fun toddler fashion so I'm just having fun with it right now.
I"ll be adding more items in the next couple months so if you love cute kid clothes & accessories- and adult graphic tees- then you'll love my shop!
I'd love to have you visit it, you'll find it here: Tattered and Inked Etsy Shop
So then, onto the most recent furniture redo.
I recently found several cute coffee tables during my thrifting hunts & I have so many fun ideas for them!
But for this particular one, I had a good friend I was hunting for because they needed something longer & a little more colorful for their new home.
I found this pretty little coffee table while perusing through Goodwill a few months ago & just knew it'd be perfect for them!!

It had pretty lines, a slightly curved top and storage both with the shelf underneath and a small drawer.
It was in ok condition, scratches & worn areas like crazy though.
First things first, we had to pick a color.
She was wanting something that would bring a pop of color to their living room, but nothing too bright- more of a subtle color pop :)
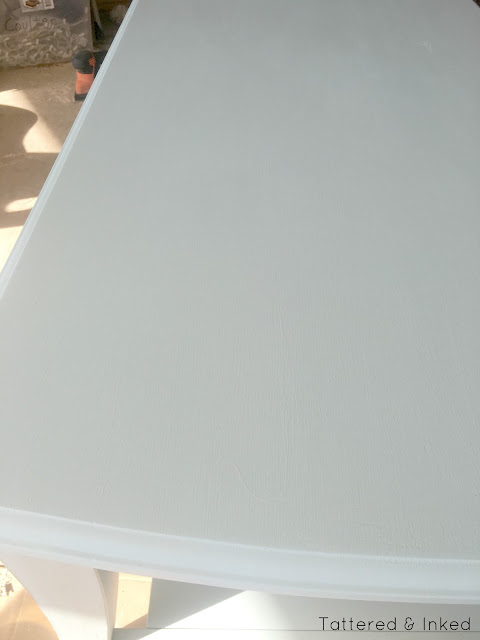
We found this gorgeous grey-blue color called Aquaverde & knew it was the instant winner!

It's so hard to show a good & accurate picture of the color during painting, but it was beautiful.
I mixed together my own chalk paint with Plaster of Paris, water, and the Aquaverde paint from Sherwin Williams.
I wanted that pretty chalky finish and it worked amazing!!
After painting three coats, I wanted to add a little more depth to it rather than just the flat color.
Here it is after adding a bit of glaze to it:

See how it adds so much more depth to it??
I think it makes it look much more finished this way.
Plus a little aging always make things looks better right?!?
I still wanted a little more to it and since I"m obsessed with anything industrial-inspired, I thought adding a few nailheads would be just the ticket.

I always pick up a couple boxes of these when I'm in Hobby Lobby because they are the perfect finishing touch to nearly anything.
I got them in the larger size and in Antique gold for this project.
Then I just carefully hammered them into each corner of the table.
Use a soft cloth in between the hammer & the nailhead to keep it from getting scratched up.
It's all the details so I love adding surprising touches to pieces!
I also decided to spraypaint the inside of the drawer white before painting it, the drawer was the same dark wood as the table and I didn't like opening it to see the original color- I wanted it to flow more with the new color.

The hunt for the perfect new knob was a lot quicker than I imagined!
I have these pretties in my laundry room (which I"ll be sharing soon!!) and knew it would look perfect on the table too.
Ready to see the whole thing??

You can see more of the blue coloring now, can't you?
I just love, love, love the finish on it!!


For something so small, the nailhead accents sure add a lot to it!
The antique gold was the perfect pairing with the glazed finish.

My biggest tip with glazing, especially if you're working in the blazing heat like I am, is to have a paintbrush with your original color (in this case, the blue) on hand as you're going. If I ever get too much glaze for my taste, rubbing doesn't always take off what I want. So I just lightly run my blue paintbrush back over it and it usually tones it down perfectly. It helps it blend into the original color much better.

I sealed it with finishing wax for a buttery finish.
Aren't those legs beautiful?!?

I loved the color so much, I may have painted something in my own house with it!
Stay tuned on that one :)
Stay tuned on that one :)

Ready to see the befores & Afters of this beauty?
Here ya go...


I mean, how could you go wrong with adding blue anyways?
What do you think, are you loving the new look?
Like me on Facebook. Follow me on Pinterest. Subscribe to my feed.

No comments:
Post a Comment
Reading your comments makes my day!!! I'd love for you to leave me some love and make me smile :)