Pages

May 23, 2010

Trunk Re-do

Remember this picture from this post?


I promised a reveal soon... and then promptly forgot to show it.
Sorry about that.
Apparantly school has messed up my head. Ironic, no?

I successfully made it through my first whole week of OT school.
Overwhelming but doable... at this point.

You will all be very happy to know that one of my classes is called 'therapeutic activities' and consists of CRAFTING.
Yes... I was happy too.
So far, we've done mosiac tiling, woodworking and sewing. Decoupage is tomorrow.
It's much needed stress relief.
Loving it.
And it DOES have a therapeutic purpose. Absolutely.

Moving on to this lovely I found for 8$ at a local antique store:


I was in love.
The handles... the hinges.

It needed  a lot  of love though.
Dings, scratches, chunks of wood missing...

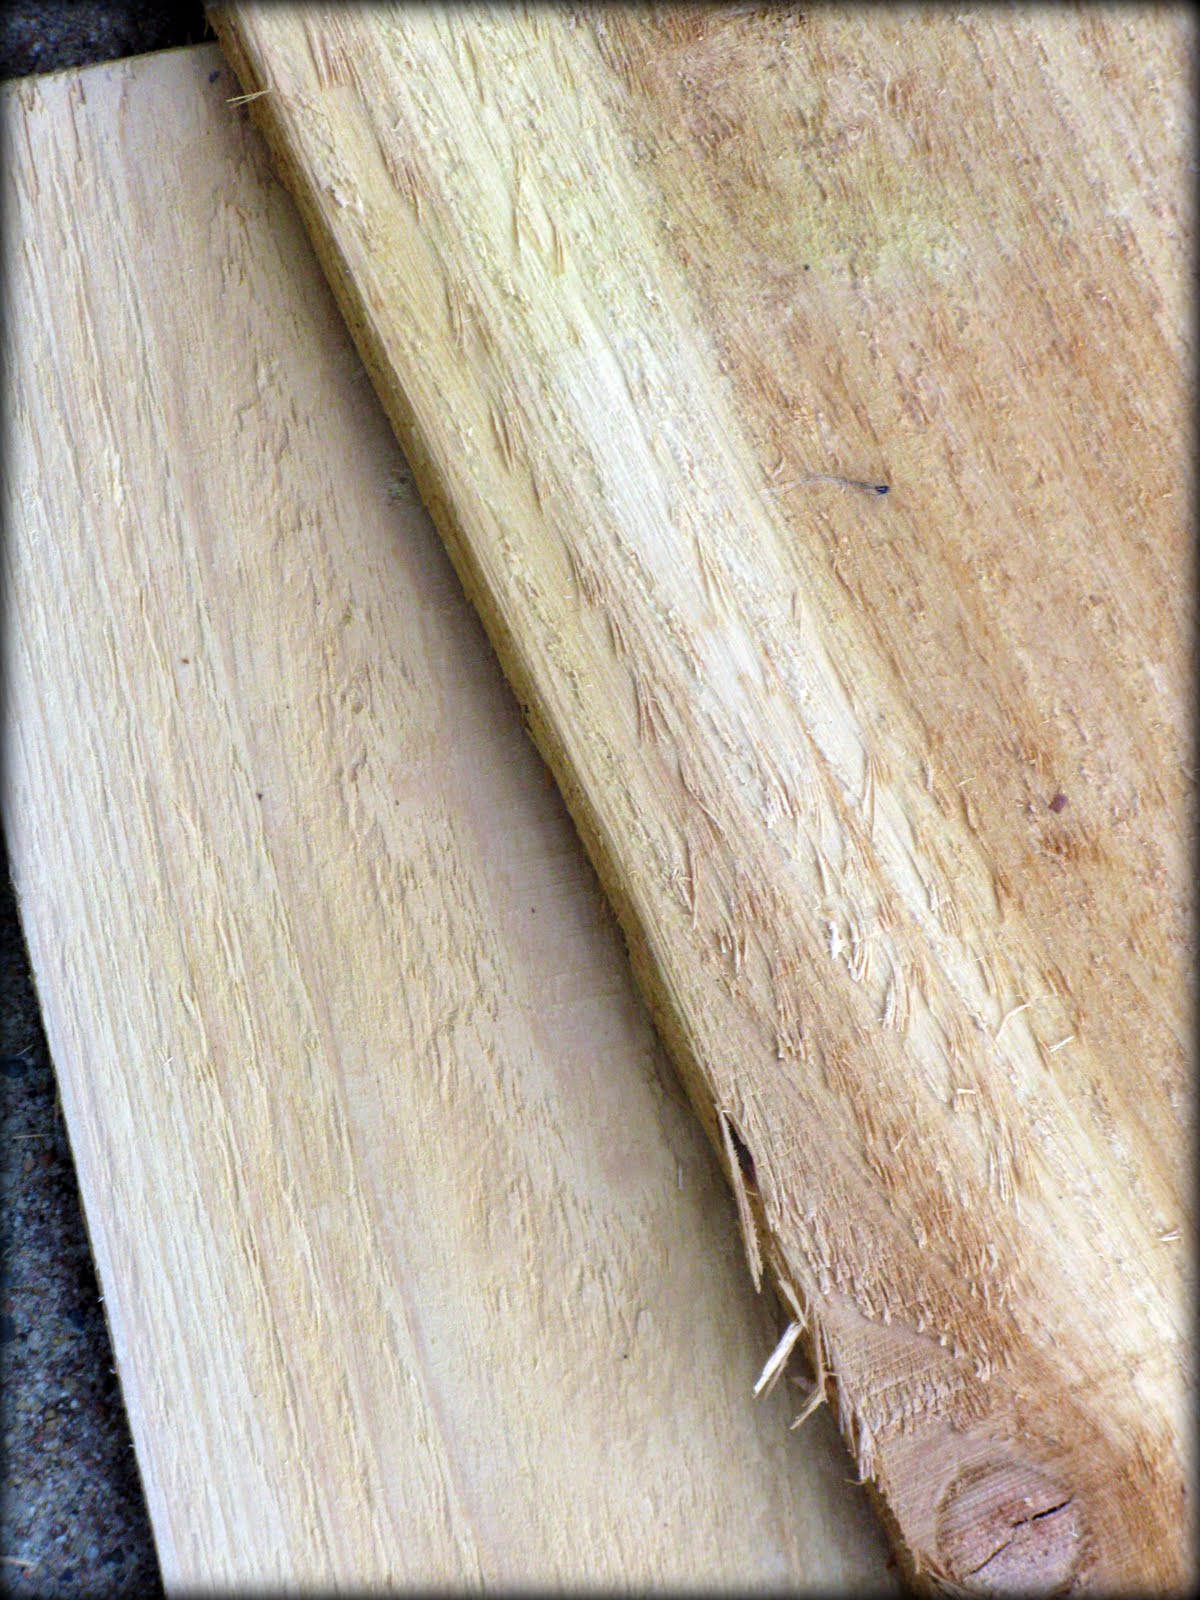
So I promptly took it apart... it also had a tray inside that lifted out but I put that to the side for now.


Beautiful wood, huh?
Too bad it was marked up everywhere. Poor thing.

I grabbed my favorite color:


And got to work spraying it down.


Here's the bottom... isn't it crazy how it pulled out that grain?
Kinda like it.

Here's the purty top:


Then my amazing find came into action... my amazing friend, Amanda, and I were browsing through Hobby Lobby when we discovered this:


I was in.love.

Spray crackle? Ummmm....yea.

You control how much crackle you want by spraying lighter coats or heavier ones.
None of that making sure you don't coat over a second time or it won't work kinda deal.

Love love love it.
And it's Valspar, my fav.

Here's what it did for me:


Amazing.
I really needed two cans but I made this one work cuz I was too excited.
It did it beautifully.

And aren't those hinges just amazing all by themselves?
I didn't mess with their color.

Here it is all put together and with it's new face:


Soooo much better.
I added a knob to the front and took the side handles off.
I wasn't going to be moving it around much and it needed to open from the top.
So I'll use the handles for it's little tray I still have :)


I'm pretty sure I grabbed that H cheap at Walmart. I just sprayed it with Hammered Bronze and on it went.

Love it in my living room.


It holds my blankets perfectly.

Sorry it took so long.
I think it was quite worth it :)


HookingupwithHoH


signature


May 17, 2010

"California" Wall Hangings

I heart California.

Let's just open with that.
I fell in love with San Diego on a youth choir trip and still am enamored by it today.

It's beautiful... it's beachy... it's sunny... it's peaceful.
Coronado Beach is my favorite place to be in the world.
Cayman Islands are a close second.

But there is something about that California Beach.

So when our friend Chris moved into his beautiful, first brand new house, I knew exactly what I wanted to do for a house-warming present.

He's a native Cali and loves it with all his heart.

He's from Orange County/Laguna area so thus my idea was born.

He needed something to hang on his bare walls other than bachelor Corona posters. Ick.

And I had these:

(Don't know why some of these turned sideways... sorry)

But I found these lovelies in my favorite place...on the side of the road.
Which means FREE.
Love that.
(But you can pick up scrap pieces of lumber anywhere...check your local hardware store)

I mean, they're awesome...why throw them out?
Yes...they're rough and scraggly but soooooo?

I grabbed my amazing little mouse sander:


Can you see the difference?
One- scraggly. Other- smooth and purty.

Next, I decided to do a light layer of color on each... I chose to paint them in the color opposite of what I wanted the top coat to be in the end.
So the one I wanted brown, I used blue in this layer and so on:


After I lightly sprayed them down, I let them dry.
Then put their top coats on:


Pretty and vibrant, huh?
But a little TOO pretty and vibrant... they are going in a guys house after all.

So my mouse sander did it again:


All I did was lightly sand and the bottom layer popped right out!
Makes it look all vintage-y and beat up.
Perfect!
I love how the brown turned out:


Then I used Word to get the fonts I wanted
(Sure Cuts a Lot software would make this so much easier, huh??)
But I went old-school and cut out (yes, handcut!) each word:


I decided on "California", "Laguna" and "San Diego"
His three favorite places.

Then they each got their fab word painted on:


Love this yellow and brown combo!

Didn't they turn out pretty?


I sanded the letters a little too... just cuz.


I love them.

My favorite is this one:


I am so in love and so jealous that I don't have a reason to sport California words...

maybe I just don't have to have a reason :)

So they were stacked up, packaged (manly of course) and given away:


He loved them.

And I love that :)

Visit thecsiproject.com

This post was featured here:

Photobucket

Thank you so much, Rachelle!
She has a fantabulous blog...check her out and all the other fabulous things she featured!

Also featured here:

Beyond The Picket Fence


Also...here:


signature

Linking too: