Pages

August 31, 2011

The Little Stenciled Table and the "Frosting" on Top

So guys.
I've had about all of vision impairments, cognition terms and attention, aphasia, agnosia...left lobe lesions...blah blah blah.... that I can possible take.

We were assigned over 300 pages to read in the past few days for an upcoming test on Thursday and my eyes hurt from reading it.
You know you need to take a break when you've read the same chapter twice and it's still all a blur.

So escaping to here is going to save my sanity, kay?

So how abouts I show you a cute little table instead of bore you with cognition terms?
Yes, much better.
Much, much better.

So... onto the goodies.

I picked up this little...er...gem...um...last year.
Yea.
But I actually did this table last summer...
and promptly left the pictures in another folder where I forgot about them.

Go me.
But it's here now :)


It's a cute little thing that I picked up at Goodwill for 3 bucks.
It has wheels and was in good shape so it came home with me :)

I promptly removed the weird wooden handles and painted her down with some Heirloom White.


Much better already :)

I sat there for a bit trying to think of something epic to do on the top.
Because it definitely needed some epic-ness going on.


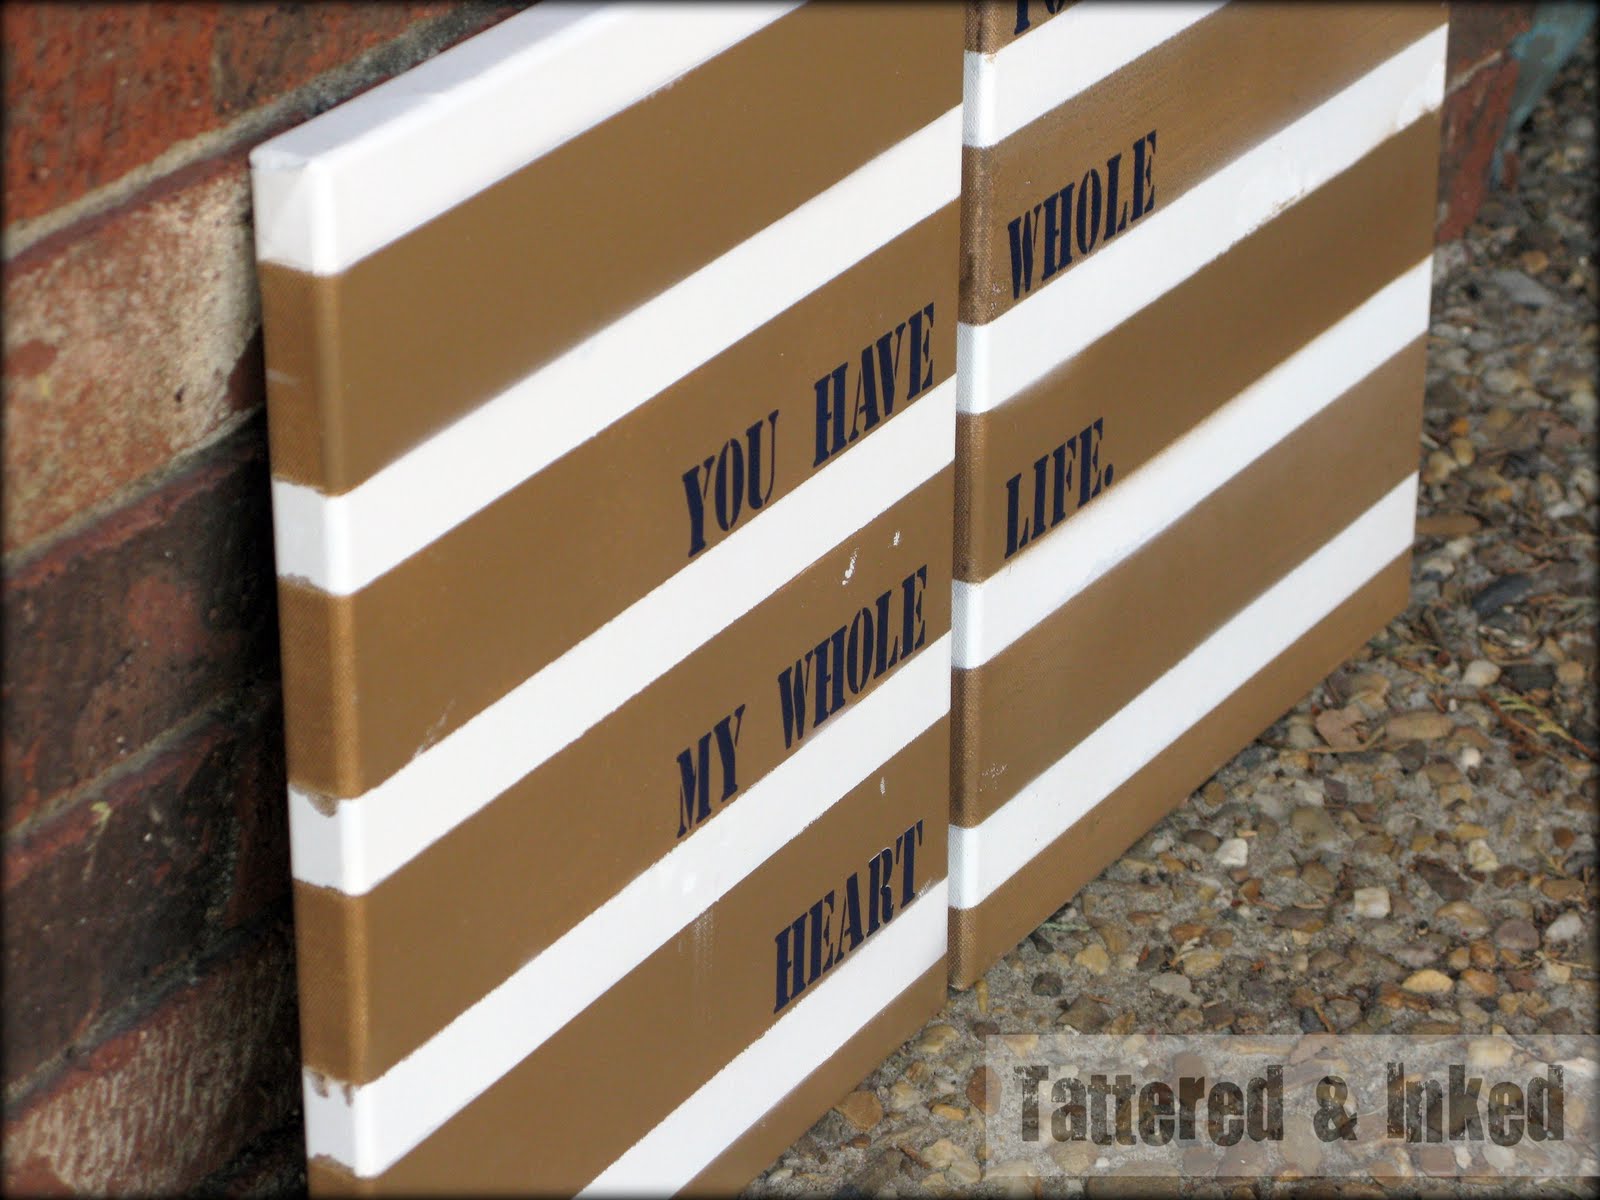
This project was being done right around the time I did my stenciled burlap pillow.
So I had the placemats handy.

I laid two of them side by side- see which one had already been used?
I love these things. 


I used Espresso Brown again which is in top three colors right next to Heirloom White...and um... I guess Mediterrean Blue (at the moment...although Squash Yellow is a close runner-up)

But I made a teeny mistake by thinking that overlapping the two placemats in the middle was a good idea.
I should have just cut them.
So the brown bled a little.


After a brief frustration moment, I went right into trying to fix it.
I sprayed the offending parts again with heirloom white...


And repsprayed the middle in the brown.
Voila.
Easy fix- no tears needed :)

Idk why it looks so faded on the sides, it must be because the middle was still fresh.
It all looks purty once it's dried :)


I decided that it would look cute in the corner of my dining room...
this was how it looked for most of last summer...


And I was never totally in love with it.
But there were more pressing parts of the house to worry about.

Not to mention that this summer was the summer of renovations-
purty new wood floors and thick molding...
plus new less-yellow beige paint on the walls :)

So the corner needed some sprucing too.

Enter in it's need for new 'frosting'.
"How to Lose a Guy in 10 Days" anyone?
I love that movie :)
Sorry, all you Mathew McCoughaney haters.
The love fern? Priceless :)

This frosting started with this sweet vintage frame I got from my grandma...


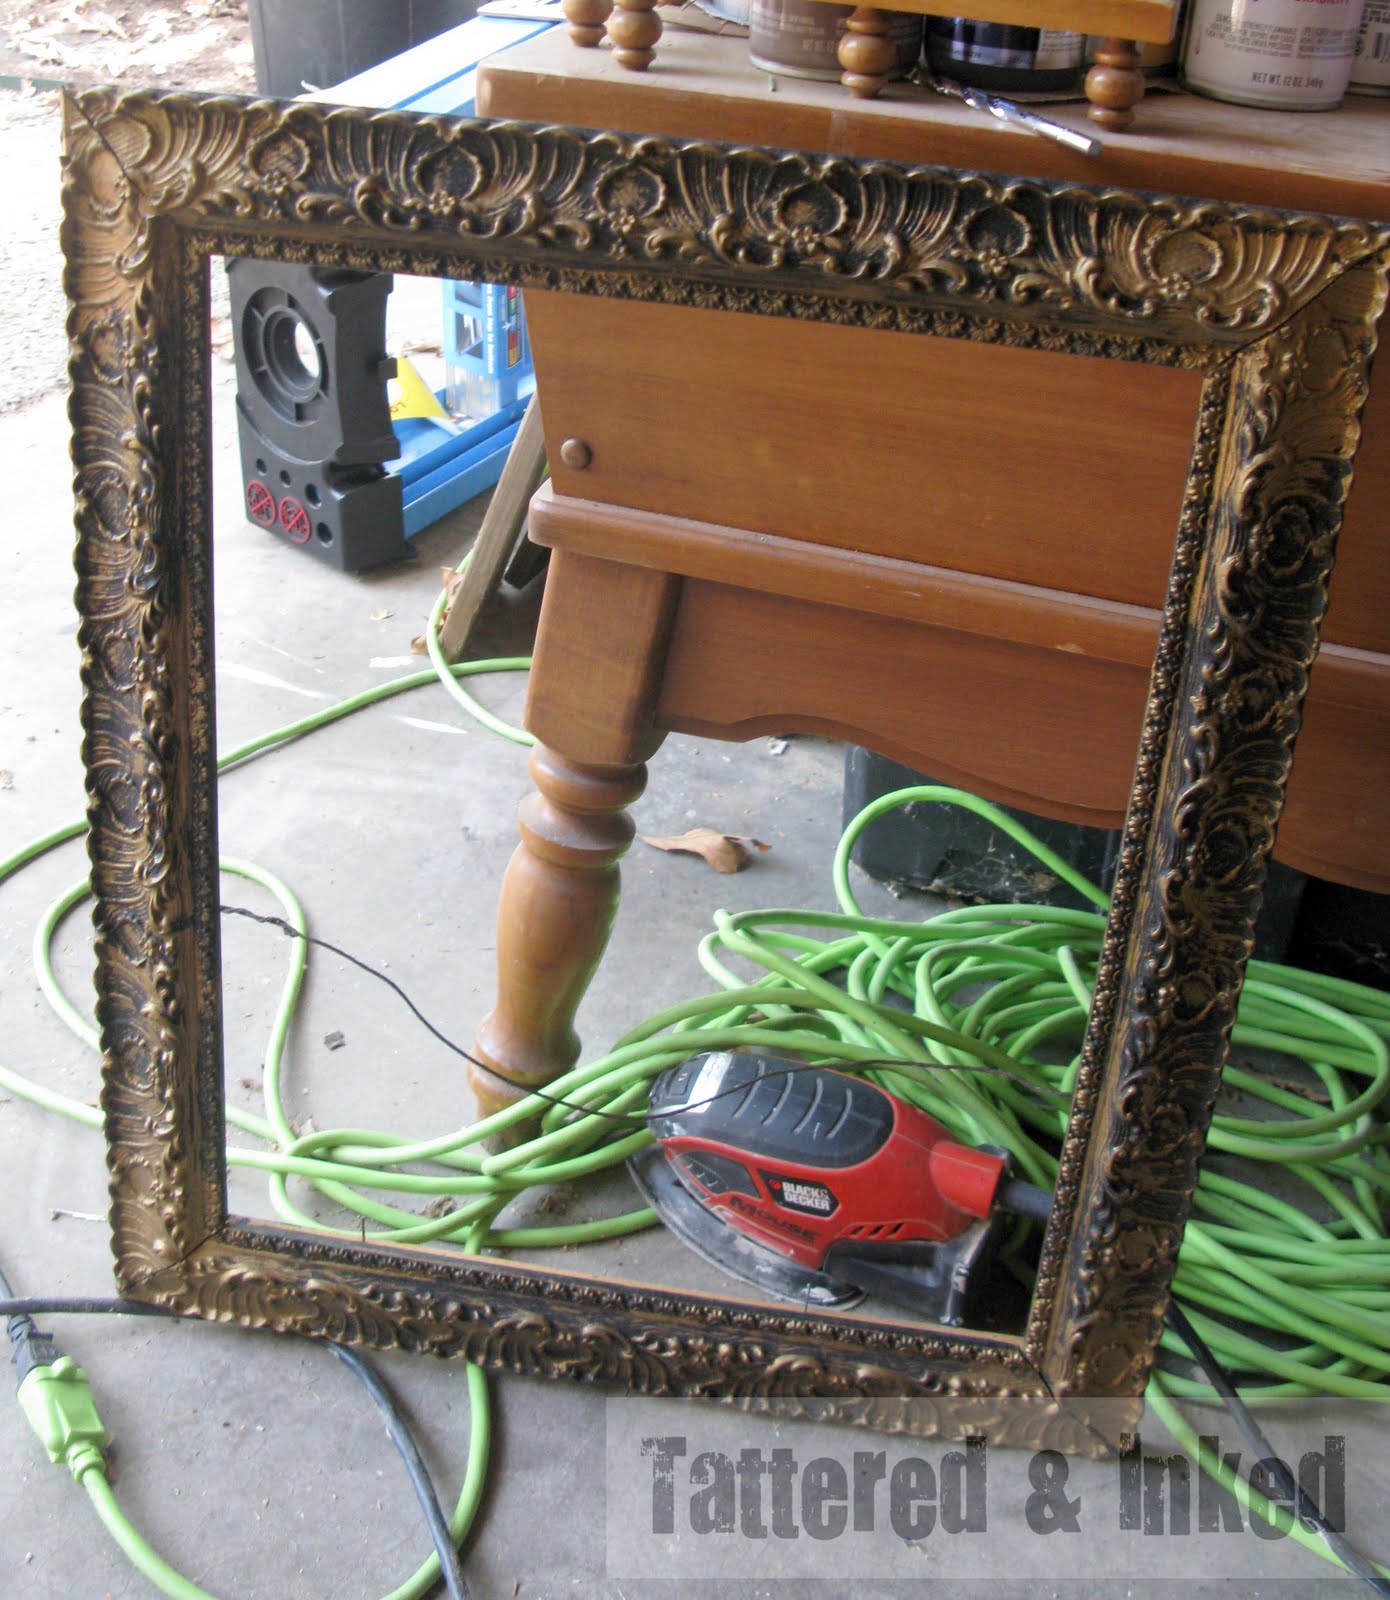
It was in rough shape but a couple of staples got it together again.
And a fresh coat of white paint :)

I played a little...and still came up short...


Ah. Much better.
This I liked. 


 I got this cute little bowl a few weeks ago.
I'll show you his transformation another day :)


I kept the white candle and blue plate.
The plate was painted and glazed a while ago but the candle got a cute rub-on to add sumthin' fun. 


These glasses were picked up at Goodwill a while ago and the little yellow one was actually my first piece of glass to paint.
Even before my painted vases :)
It got a little vinyl love too. 


I decided to keep the original wire on the frame and just clipped some of our beach pictures to it with some mini clips I had.
I clipped some vintage music sheets behind them to add a little vintage glam.


And the burlap underneath the candle got a little stamping love to add a little character :)


 So basically, my little table was 'frosted' in all my favorite things...


What do you think?
A happy ever after ending? 


I'm off to be buried in my textbook again,
leave me some love so I can escape into reading all of them later, kay?
Sounds like a plan :)

Happy Wednesday!


**Don't forget to enter the Uprinting Giveaway!!! Giveaway away closes tomorrow night!!**
post signature

Linking to:

August 29, 2011

The "Swirled" Plate Wall

It sounds uber fancy.
But, really, it's not.

Although it is pretty :)

Instead of getting a jump on the millions of chapters in my textbook I'm supposed to be reading
(I mean, a test on the first week of school, really??)
I decided I'd show you my plate wall instead.


I have to tell you that I'm quite proud of this little ole' wall.
It took some time to round up all the plates that would fit together just perfectly.
And then the hanging, and the falling... (you'll see...) and the re-hanging.

And now it makes me smile every time I see it :)

See? Boring boring blank wall.
Actually it's only blank because I took down the big canvas picture that was here to make this.
So I left myself with a blank wall.
Oh well.


I've known that I wanted a plate wall since we moved in so I've been collecting them since then.
Yup. Two years, guys.
I'm sure I could have done it a lot sooner than that, but I was looking for the perfect plates.
I could have done the ever popular all-white wall.
But I wanted more color.

So I'd pick one up here and there
until I had a stack that I started playing around with...


Ugh. I'm so glad that nasty carpet is g.o.n.e.
I was good with this layout for the moment...especially since I knew I was going to add some patterns to some of the plain Dollar Store plates...

I used some ceramacoat paint to whip up some stripes and chevron-
the black and white plate was done the same way I did the ones for little man's pirate party. 


After I had finally decided I had enough plates to hang,
I started buying the 'Disc Hangers' from Hobby Lobby.
I only bought a few each time I went because even though they're only 2-3$ a pop, it added up quick.
These things are awesome- no more seeing little plate hooks pop around the sides :)

I followed the directions to adhere them to the backs and let them set the allotted time.


While they dried,
I cut out sheets of paper in the shapes of each of the plates to get an idea of how big they each were.
This was the easiest way I could find to hang them.
I labeled each paper as well just so I wouldn't get confused.


Then I hung each piece of paper on the wall with tape.
I had laid the plates out on the ground in the design I liked, and then just copied that design onto the wall with the cut-outs.
That way I knew how much space they'd take up before I just started nailing them up there. 


I literally started from one corner and worked my way out.
It was super easy once I had all the cut-outs up there.

I wanted a more 'swirl' pattern than just a straight-across or symmetrical pattern.
So I worked out and down the wall :)


 I pretty much squealed in delight when I saw all of them up there.
I've been collecting them for so long, I didn't think they'd ever get hung!!

Here's some close-ups of some of my favs:

My little birdie plate from Pier One. 


This blue and brown embossed one and the cream embossed one are from Pier One too.
If you wait for their sales, their plates are super cheap :)


Once they were all up, I was able to notice any gaps that I didn't like.
And I realized I had completely forgotten about my gorgeous Willow House plates I won a while back!
They are gorgeous so they had to fill in the gaps (the pretty brown swirled ones)


So here it is after I added a few...


Did you notice that the white platter in the middle changed?
Well that's my 'falling' story.
After I hung all my plates, me and hubby were watching TV and we heard a loud crash.
I didn't even want to look- I was afraid the whole wall had come down...
so Hubby came back with the pieces of the other white platter...

Then... I found the perfect replacement above...and it fell a couple days later.
Its' like that part of the wall was cursed or something.
I was so sad because I was in love with that new, ruffled plate.

It took me forever to find the replacement for that one...
Here's the sad line-up with the new replacement at the end-


I'm still in love with the middle one but TJ Maxx never got anymore...sad times. 


And a few months after the wall was hung,
we got some new/old dining room furniture.
My grandma, who passed away a couple summers ago, had left her furniture to be divided among all her kids and grandkids.
I was so excited to be given one of her dining room sets that date back to the 1940's.

So when the buffet was moved in,
the plate wall got moved...


It just seemed to go better on that back wall, so your eye was drawn to it as soon as you were in the room.
The buffet was pulling your eyes to it and away from the previous wall, so they looked a lot better together :)

Plus not a single plate has fallen since moving them... I guess this wall has a better plate attitude :)

Although I'm still working on decor for the top of the buffet.
One step at a time, guys.

So there ya have it,
the 'swirled' plate wall...


Here's where each plate was purchased (at least as best as I remember):
(working from far left corner down)
*3 Brown Swirled Plates- Willow House
*Yellow Bird Plate- Pier One
*Small Brown & White Plate- Pier One
*White Square Plate- TJ Maxx
*Large Cream Ebossed Plate- Pier One
*Blue Square Plate- Pier One
*Blue Chevron Plate- Painted Dollar Store Plate
*Large Yellow Plate- TJ Maxx
*Black and White Bird Plate- TJ Maxx
*Beige Starburst Plate- Pier One
*White Platter- TJ Maxx
*Tiny Square Plate- Pier One
*Black and White Chandelier Plate- TJ Maxx
*Blue Embossed Plate- TJ Maxx
*Black and White Striped Plate- Painted Dollar Store Plate
*Cream Leaf Plate- Pier One
*Cream Octagon Fleur De Lis Plate- Walmart

What do you think?
Worth the wait to gather the perfect ones??

Do any of you have a plate wall?
I'd love to see them- be sure to leave me a link :)


post signature


Linking to:
UndertheTableandDreaming

August 26, 2011

Black & White Distressed Dresser

Happy Friday, ya'll!!

I'm excited that the weekend is here- starting out with just two days of classes is nice.
Just enough to get your feet wet again without completely exhausting you.

Now if we can have a nice, dry weekend, I can get some painting done :)

Speaking of painting,
I've been wanting to share the full dresser makeover that I gave you a glimpse of on my FB page.

Remember my awesome dresser find at Habitat a while back?


And you can't forget it's brother...


And actually these guys have a little brother too...but you'll be seeing that later
(Hint...I'm totally keeping it!)

But the bigger two of the trio were meant to be sold.
I was so excited when we found these-
these are the kinds of treasures you rarely find at Habitat.
Usually they put pieces this nice on auction but I got there the day they came in and brought the littlest one home with me right away.

The two dressers were 75 a pop and I was a little too scared to buy them without hubby's approval.
Even though they were totally worth it.
Hubby completely agreed and thought I was crazy for not buying them on the spot.
So we trekked back there and snatched them up.

These were in perfect shape- drawers were amazing.
Hardware was updated.
But the paint job only looks good in theory.
It was way too slick and shiny- like trim paint.
And it was starting to yellow in places.
Plus there were some nice scratches on the top.


But with a little sanding and a LOT of beautiful black paint,
it was brought back to fabulous life :)


 I painted it 'Silhouette' by Martha Stewart.
This was the first time using her paint and I WILL be using it again.
Creamy and dries the most beautiful soft black.


I loved the idea of having the white coat underneath come through so I distressed it quite a bit using 80 grit sandpaper. 


I wish you could see this guy in person because the effect was beautiful.
The white cast almost a silvery hue on the black and was ah-mazing!!

I kept going back into the garage to look at it and picture it in our own house.
But hubby nixed that idea quick.
"We're supposed to sell it, babe...plus we don't have any black furniture"
sigh.
True.
It would take a whole decorating overhaul to make it work.
But I might be okay with that in the future...


So onto Craigslist it went...
and it sold the next day.

I was beyond ecstastic when that happened.
Fastest turnaround ever.

Plus the new owners loved it so much that they want me to paint an armoire to match for their upcoming little boy's nursery.

Triple score!!


I can't wait to do the matching piece...
I was definitely sad to let this one go.

But every piece has a home :)

One last look...


Now to figure out what to do with it's brother...

Any ideas??

*don't forget to check in Monday for a fabulous giveaway!!*

post signature

Linking to:


August 24, 2011

Striped Canvas Art

I'm trying not to mope around today
Thinking about it being the last day of summer vacation for me...
so instead we're going to focus on something fun :)

I did these canvases a while back-
back when it was warm and not pass-out-sweltering here.

And way before Pinterest hit the world...
so this quote wasn't completely overused then :)

But I needed something to fill some blank space in the master bedroom and I loved the quote "you have my whole heart for my whole life" that surfaced in the blogland during spring.

So I grabbed my two 16x20 canvases...
Am I the only weird one who loves blank canvases?
I like to stroll down the canvas aisle in Hobby Lobby because they're so full of potential :)
I'm an odd duck, I know.


I decided to try a different color than I was used to and used 'Nutmeg'.
It's a really pretty creamy copper brown.
I like it but it won't go everywhere in my house.
Luckily, it'll work perfectly in our master bedroom :)

I sprayed them with heirloom white first to give them a good base.
 Then I used painters tape to mark off stripes and painted the blank space Nutmeg.

And because I like to have company with me with I'm working, my kitties got right in on the action.
See the white smudge?
Total tail flick.
Oh and it was completely intentional.
And because I'm stubborn, I didn't fix it :)
So Ellie has officially helped out with her first project.


I used rub-ons that I had on hand for the words.
I love rub ons :)
These went on perfectly and I just off-centered them the way I wanted.
Easy peasy.


Apparantly, everyone wanted in on the action because little man totally plopped down and struck poses as I was taking pictures :)


I love the stripes with the words and I'm in love with the new color...


The perfect solution for blank wall space!!


And the worst picture in the world goes too...
this one.

But I wasn't about to move the TV to get a good one.
Sorry, guys.
It would seriously eat me.

And I'm not ashamed at all to have a TV in there...
when you're super tired and just want to cuddle,
you throw on Friends and all is good in life :)

And I adore my MadebyGirl print on the opposite side of the canvases.


One last time...


What do you think??
A fun, easy way to fill space?

I hope you guys have a great Wednesday and think of me tomorrow when I have to step into school-world again. Ick.

Happy crafting :)
post signature

Linking to: