Pages

December 19, 2016

"O Holy Night" Christmas Mantle

I guess it's about time I finally get some Christmas up on the blog, huh? 
It's been harder & harder lately to get any free time to blog which has made me feel pretty lame lately. 

But here I am!

I was super excited about decorating for Christmas this year since last year was a 'just get up what you can' type of year since we had just moved in!
I had time to actually plan out what I wanted this year. 

I won't keep you in suspense for long, lovelies. 
Here's my simple but pretty Christmas mantle this year: 


I always love having a large centerpiece for most of my mantles and this year was no different. 
I knew right away the shape I wanted but couldn't decide for the life of me what quote or image I wanted to put on it. 

Then I stumbled upon this image on an amazing Instagram page I happened to stumble upon (thanks Pinterest!) and knew it was the perfect lettering for my sign. 


(Image via Louie Dahlquist, on Instagram here

I asked his permission to use the design for tracing onto my sign & he graciously said yes!
It was PERFECT. 


The sign was made from reclaimed barn wood from my sister's house- we have a whole stockpile of awesome wood & I'm in heaven :) 

I created the shape onto paper to make a template for hubby to cut it out. 
We left the old barn hinges on the bottom because...how could you not? 


After creating the sign, I gave it a nice coat of a bright red I had on hand, then brushed some black & white paints into it for a more worn & layered look. 

Then I used the hand-lettered design, blew it up & handpainted it onto the sign. 
Gorgeous, right? 


I've had the DIY fabric trees for several years now & they're still holding up great! 
They were perfect for flanking either side of the sign. 


The stockings & garland were all DIY projects from a few years ago now too. 
I still love our simple burlap stockings!! 


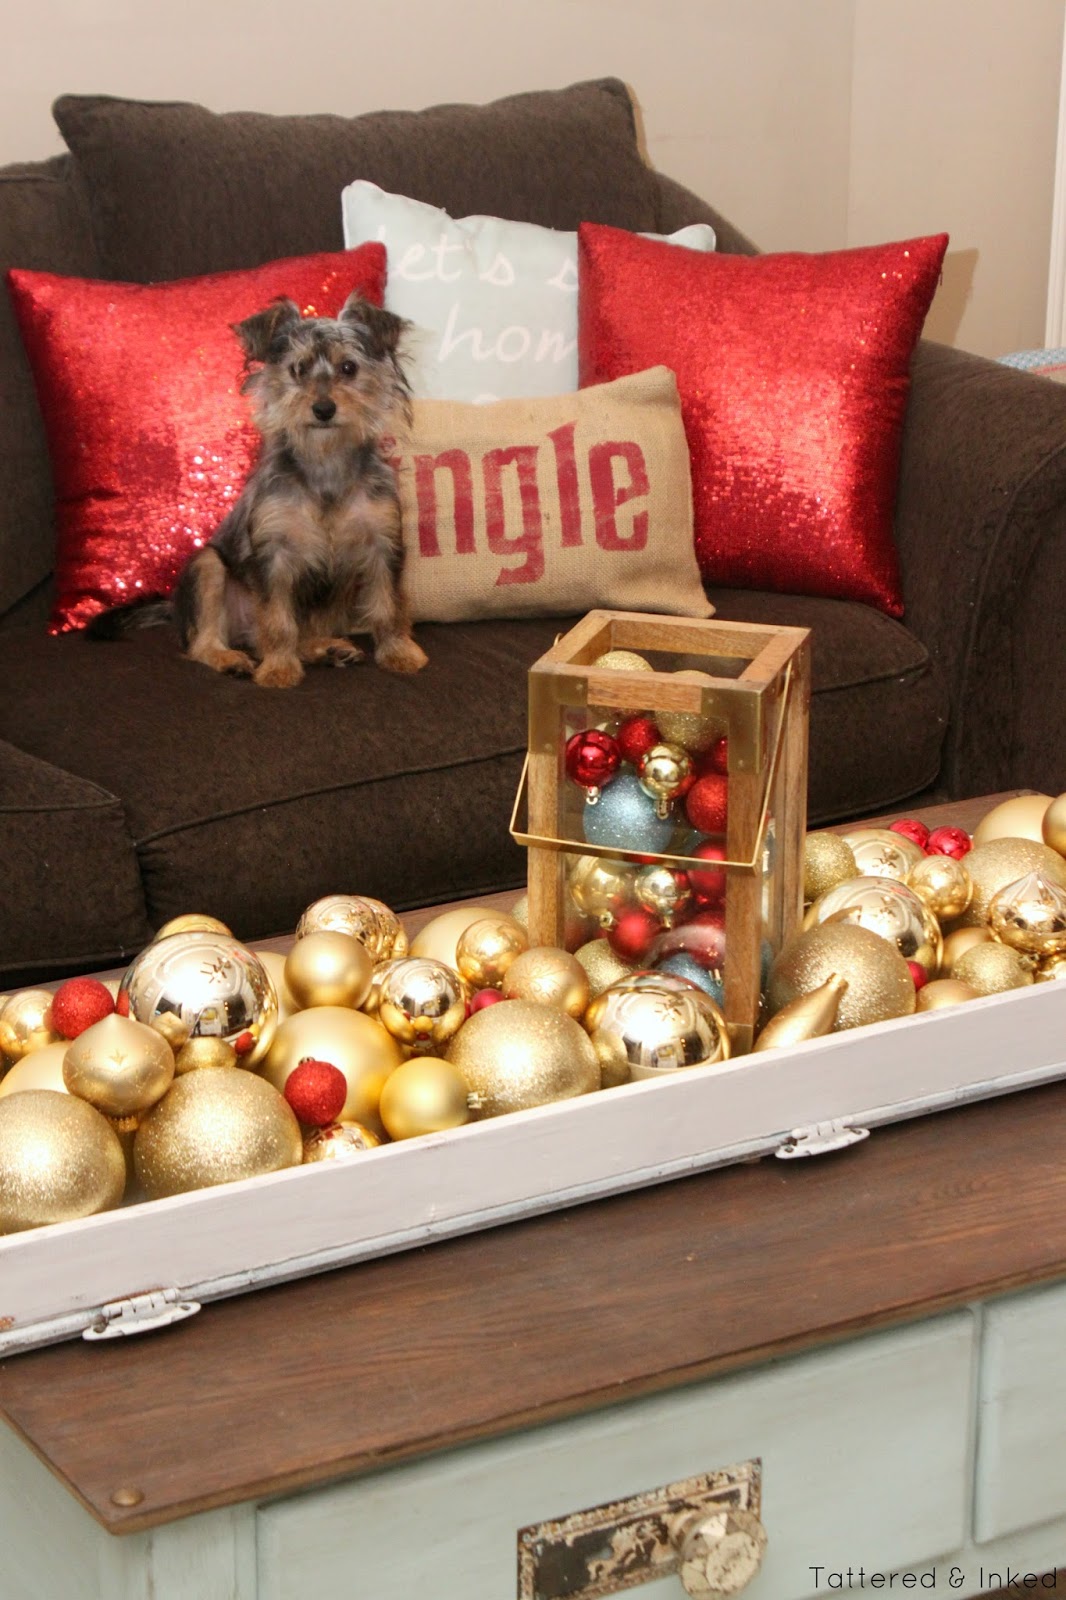
One of my favorite simple additions this year was filling a tray that I created from an old cabinet door & scrap wood with heaps of gold & red ornament balls. 

The tray was built for the dining table but was exactly the right length to fill up the coffee table. The gold ornament balls were under $8 for all of them at a local discount store. The gold lantern came from the same discount store for $10. Gotta love simple & cheap :) 


The "Merry Merry" Burlap pillow is a DIY pillow cover I created from a Christmas sack that one of my gifts came wrapped in last year. 
Perfect for lounging fireside. 


Although pictures were few & far between this year, I snapped a couple of the front foyer just to share with you. 
It's the world's hardest place to get a good picture but I just love all the aquas & reds together!!


The red burlap wreath is my most favorite DIY project this Christmas (besides the mantle sign!) and is so easy to do!
I love how full & colorful it is. I added a birch deer head that I bought from our local Holiday House this year. 


I love Christmas decor with all its sparkling lights & pretty colors- snuggling up on the couch with the Christmas lights on & a cup of hot tea is my all-time favorite feeling!

I hope you are having a magical Christmas holiday season!
Details for all the pictures above are found below if you're curious :) 

Merry Christmas friends!


------------------------------------------------------
Item Sources: 
(Living Room) 
O Holy Night Sign: DIY by me, hand lettering design here
Fabric Trees/Wooden Snowflake: DIY by me
Gold Snowflake on stand: Hobby Lobby
Stockings: Kohls, embroidered by me
Garland: DIY
Coffee Table Tray: DIY
Gold Ornament Balls: Target
Lantern: Target
Coffee Table: DIY

(Foyer)
Twas the Night Before Christmas Sign: Holiday House purchase
Fabric Trees: DIY
Wooden Tree: TJ Maxx
Gold Votives: Dollar Store
Aqua Mirror: Thrifted and repainted
Red Burlap Wreath: DIY
Merry & Bright Sign: DIY
Wood Octagon Mirror: Target
Golden Reindeer: Hobby Lobby
Wooden Snowflake/Baby It's Cold Outside Mirror: DIY


Like me on Facebook. Follow me on Pinterest. Subscribe to my feed
Pin It


post signature

November 14, 2016

Fall Mantle 2016

I know, I know, I'm on the late side of things with this post. 

Butttt in all fairness, I just plain decorated late too. 

I only got this up a few weeks ago...because it's been so darn hot around here that it hasn't felt fall enough to pull out the pumpkins. 

So I finally just told myself to get to it!

Here's what I came up with in this non-fall feeling fall around here...


I went with lots of neutrals this year with pops of my favorite blue & gold tones. 


Do you see my excitement over the new Gilmore Girls revival episodes showing through??
I just knew we needed a Stars Hollow sign to grace the fall decor this year so I came up with this fun sign that resulted from an 'oops' during another project. 

I'll be sharing a bit more on it soon- I love the rounded shape vs a traditional square or rectangle sign. 
I tweaked the original Stars Hollow blue to be more in my light, minty blue. 
And, yes, it'll find a permanent home somewhere after fall decor goes back up. 


I used my favorite and super simple technique to make a quick wreath in my favorite mustard color that you're seeing everywhere this fall. 
I kept it simple and didn't add any contrasting textures to this one.
See the tutorial on how to make one here


The rag garland has been around a couple years now and it's still my favorite. 
Love the gold, oranges and burlap together. 

The mirror was a $3 Goodwill find a few years ago. I taped off stripes and just spraypainted the mirror to have those gorgeous white stripes. 
I use it everywhere. 
It stays in my 'party room' where all my extra decor hangs out & it gets pulled out often. 
It's the perfect filler piece :) 


I made the rustic frame on a whim from some leftover barn wood I had from another project. 
The chewed up piece was destined for the trash pile but I just have a weird love for chippy, broken pieces. 
It made the perfect chunky frame to add some chicken wire & a wreath to. 


The only other smaller pieces consist of found wood slices, chippy banister candlesticks and thrifted copper ones. The pumpkins are both from the Dollar Store!!
Goes to show you don't have to go broke to create something pretty :) 


I added the "Come Thou Fount" framed print from HL this year because this song has just been sticking with me lately. 
We all need a good reminder of where our blessings truly lie. 


All in all, this whole deal cost me around $25. 
I used a lot of things I already had on hand or created projects from scraps of previous projects (the wood frame, Stars Hollow sign). 
The only things bought were the Come Thou Fount print, the mustard fabric and the little gold pumpkin. I call that a huge success :) 

I hope you enjoyed my little fall set-up. 
I'll be sharing more details on the Stars Hollow sign soon, so stick around! 

Happy Monday sweet friends! 


Like me on Facebook. Follow me on Pinterest. Subscribe to my feed

Pin It


post signature

October 17, 2016

Fall Front Porch Decor

I'm finally able to start jumping on the fall band-wagon when it comes to decor!!
It has just been so HOT here that it hasn't felt like fall at all. 

I finally dragged out some fall decor a few weeks ago so the front porch could at least fall like it was supposed to be fall. 
I wasn't brave enough to drag out real pumpkins though because. Hot. 
They'd become really soft, gooey pumpkins really quick. 
Not so much the look I'm going for. 

I was so excited to get to decorate the new house for fall for the FIRST time. 
The thing I fell in love with first when we first saw the house was the entry way. 
I LOVE the staircase & the gorgeous front door entry. 

I knew it'd look gorgeous all dressed up for fall.
And I was right!!


The blue door, the brick stairs, all the pretty fall colors!!! Make my fall loving heart sing :) 


I wanted something simple but full of fall layers for the front area. 
I found that piece of barn wood lying in the garage leftover from a recent project and knew it'd be perfect for a quick sign. 

It was a very quick & rough sign- I wanted it to look old & worn so no worries on making it perfect! 
My favorite part is the leftover hinges that would never come off anyways. 
I have a thing for hardware. 


I layered several pieces of worn barn wood in the back and then leaned my quick & easy "blessed" sign at the front. 
The wooden shutter & sign are propped up on an old ammo crate I had in my stock pile. 


If I couldn't have live pumpkins, I knew I wanted some mums and these didn't disappoint! 
They bring all the gorgeous colors to the whole set-up. 
I popped a yellow mum into a square basket I had, threw a scrap of linen in & strung a tiny plaid banner I threw together across it. 


I drove a nail into one of the pieces of barn wood so it could hold my charm wreath from a few years ago. 

The makeshift broom was one of my most favorite DIY projects from our Harry Potter Party we did a few months ago. Check out the full DIY here


I'm in love with my bucket handle wreath still & knew it had to grace the front door this year. 

Several more mums line the brick stairs as you're walking up. 


The faux pumpkins are from lots of places- I love collecting them :) 
The tiny white one is a Target dollar spot find. 
The twine & rope pumpkin was from Big Lots & the glam pumpkin is from Hobby Lobby. 


Now for fall weather to decide to come & stay. 
This girl would be so happy!!

And maybe, just maybe, I could throw in a few real pumpkins if it would cool down!! 

I hope you enjoyed my quick fall porch tour- hopefully I"ll be motivated soon to get the rest of the house glammed up for fall too!! 


Like me on Facebook. Follow me on Pinterest. Subscribe to my feed
Pin It


Linked to: 


post signature

October 14, 2016

Toddler Room Revamp

It's been a little while, huh? 

Guys, managing an Etsy shop, a full-time job, dance classes, soccer, furniture customers & other custom orders is NO JOKE. 

It's been a HUGE learning process this past month on how much I can handle & how to balance it all. 
I'm still not all the way there yet but I'm learning.
And hopefully things will settle soon. 

In the meantime, I'm trying so hard to get photos done & edited to get some projects up here on the blog. 
Sorry for the long absence :/ 
I'm hoping to be sharing a bunch of fun fall projects & decor soon!
One of our big things this month has been transitioning Baby M from a nursery to a toddler room. 
Insert ugly crying here. 

I've been avoiding it as long as I could because I just love her room. 
When we moved last October, we basically just transplanted her nursery from the old house into the new house- the only thing that didn't transfer well was the vinyl herringbone wall. 

Two major things happened over the summer that made it so we couldn't avoid the toddler transition anymore. 

1. Toys. Guys. So many toys. I was going crazy trying to keep them organized. Mostly books & Puzzles. So she desperately needed more room for organizing all the play things. 

2. She started climbing her crib. Not a whole lot. But enough that it made us nervous. We took the front off of her convertible crib for a few weeks and that worked well. But we knew we needed something a bit more permanent soon.

The BIGGEST thing that pushed us to revamp her room was the bed. 
I had searched forever for a toddler bed that I liked that was cute, affordable and not plastic. 
Not as easy as you might think. 

We didn't want to jump right to a twin bed because we still wanted plenty of room for playing. 

Insert my sweet friend who decided to sell her custom made toddler bed AND all the handmade toddler bedding. 
It was meant to be. 

I immediately texted her and said that baby M NEEDED it :) 

So the quick revamp began!

First things first, the bed was moved in so we could see how much room it took up. 
The custom bedding was all light pinks & gold which went almost perfectly in the room. 
I layered some of her dark pink pillows & blankets in to pull in the darker pink that was mostly in her room. 


After we moved the bed in, the decor above the bed just didn't seem to flow as well anymore.
I was more than happy to take down the herringbone wall from behind the crib in the nursery- it didn't transfer to the new house as well as it went up in the old house. 

I switched out the wooden circle her monogram used to hang on with a huge painted oval frame. 
Remember it as the focal point from her party?


I just repainted it (paint is so wonderful!!) with her lighter mint blue and then added fabric to the inside.
The fabric was perfect for pulling the hot pink, light pink & golds all together. 
I spraypainted the monogram gold because the hot pink that it was before didn't look great inside the frame. 

The frame filled up the empty area above her new bed perfectly. 


We moved her large rocking chair out (so many tears with that one!) and moved her end table to beside her bed. 


Her teepee still stayed because... it's the best. 

It's the perfect reading hideout and the perfect place for the kitties & pup to take naps in. 


Her lovebug & little darling signs still hang on either side of the bed. Luckily those won't go anywhere for a while :)

Her gold rocking chair from her nursery still sits in the corner too. 


The collage wall & bench haven't changed much. Although we've added quite a few books to her basket over the past two years. 
And had to fill up a bookshelf as well :) 


As I said, we needed more room to store toys & books, so we added a small $20 bookshelf to the corner where her rocking chair used to be. 

I added the same fabric from the frame to the back and it added so much instant color & personality to that corner. 
Her princess castle, puzzles & books have a much better home now :) 


Her pretty pink dresser still resides in her room too. 
We just removed the changing pad and added storage for her bracelets & hair accessories. 


It was fun shopping the house & garage for new items to make the room feel a tiny bit more grown-up for Baby M. 

She is in LOVE with her new 'princess bed' and has to show everyone that comes in the house! 

I was blessed enough to be able to trade furniture painting services in return for the bed and bedding.
And the frame was lying around waiting to be used :) 

The only things purchased for her new room were fabric for the frame & bookshelf and the bookshelf itself.
A whopping $25.00 to revamp her room!!
I love thrifty makeovers and it's such a huge change- at least for us!!
I"m loving her new room but still super sad to lose all the 'baby' items. 
I still can't believe she's already two. 

Hold onto those babies, lovies. It's true what they say about time going so fast. 

I can't wait to share some fall projects with you guys soon- I have pieces of several of them lying around at the moment :) 

Now for that fall weather to finally kick in. Come on, Arkansas!!


Like me on Facebook. Follow me on Pinterest. Subscribe to my feed
Pin It


post signature

Linking to: