Pages

April 28, 2010

Ammo Box Makeover

So, remember when I showed you this?


Haven't you been dying to see what it's purpose is??
I know you have... so I thought I'd cut the suspense already.

Here is my fabulous little (eccentric) find:


Yes... it's an ammo crate.

How fun is that?

Now remember that I live with two guys... my husband about lost it when I came carrying this in.
It's one thing that I randomly bought at an antique store that he is 100% okay with.

My sister and I scoured a couple antique stores in Conway and found some fabulous things... but she ended up finding this shoved in a corner.
Super jealous.
So I begged her for it.

Somehow she allowed me to take it home.
But it's a loaner.
*sigh*

But I lurve it!

See the rope handles?


I had an idea for this lovely... one that my husband never ever thought an ammo box would be used for.


Here's the inside... pretty clean with just a hint of gunpowder residue.

This is my favorite part:


Not just the fabulous hardware... but the fact that it says 'ammunition for cannon'.

I can't believe ammo is still carried this way.
I guess it works.

Anyways. we picked this up for hardly anything... I searched the web and found them for upwards of hundred bucks.
Steal.

Here's what I had in mind:


Doesnt' it make the cutest little blanket box ever?

Rustic, a little masculine and altogether wonderful!

The table was an end table my husband was using but got replaced... so I painted over the boring brown and made it pop with my fav blue color.
Then I just set the ammo box on, filled it with blankets and it was ready to go.

A couple details:


I found this amazing rope at an antique store- a huge roll of it for three bucks.
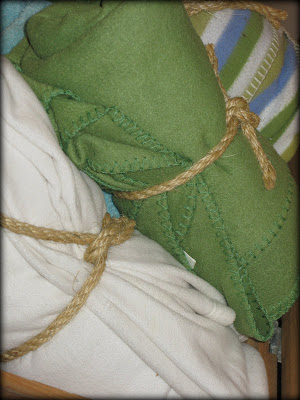
I loved how it matched the rope handles on the box so I tied the blankets with each of them.


The 'relax' sign is actually a sample piece of hardwood that my dad had from redoing his floors.
The kind a store gives you to see if you like the color.
I painted it yellow, put a vinyl saying on and sanded the heck out of it :)

Then I attached it by gluing twine to the back and looping around the corners of the box.


Sunshiney- beautiful, huh?


I'm quite in love with it.

and doesn't it look lovely under my empty frame wall?


Our cat, ellie, loves to sleep under it so we stuck her kitty bed there.

Comfort everywhere :)


Beyond The Picket Fence


signature


April 27, 2010

Elements of a Puppy party!!!


So I know everyone has been dying to see how the puppy party turned out, right?
Since it's taken so much of my time and energy lately :)

And now I can breathe for a couple of days until finals hit.

So without further ado, here are some glimpses into my little man turning three!

April 21, 2010

Birthday Update: Party Trays

So puppy party is now five days away... eek!

I still have tons to do... and semester exams are coming up so professors are piling on the workload.
Don't they know Ryan turns three on Sunday????

Well I'm not one to be a huge spender on throwing lavish parties but I like things to be CUTE.
With a capital C of course :)

So I wanted some cute serving dishes.

While I was perusing the dollar store I found these:


Updated Frame

So remember last post when I gave you a sneak peek at what I've been doing?

This is what I showed you:


So I don't know if this involoves a TON of creativity because I absolutely adored it the way it was... but I just had to show you.

I'm in love with it.

Here it is:


I found this gorgeous piece at a local Antique Store for three dollars.
I saw it out of the corner of my eye and instantly fell in love.

The creamy color
The rough texture
The size (and price!)
It was perfect.

So I carefully took the sticker off and decided it absolutely did NOT need to be painted.

So I grabbed some fabulous fabric from my bench and one of my fav pictures of my little guy from my Wye Mountain trip and started putting things together:


Doesn't that fabric look beautiful in the frame?
I thought so :)
Well I wanted the picture to pop a little bit... not just blend right into the fabric so I grabbed a piece of thin cardboard I had:


and painted all the edges my pretty blue.

I sanded down the edges so some of the cardboard feel came back out.
Can't be too perfect... right?
I'm into the messy look :)


Then I attached the picture with picture glue dots to the cardboard.... this way I can switch it out fairly easily.

And... ta da!!


I LOVE how it all went together.
Now I just need to get a prettier color on my walls.

:)

Isn't the detailing beautiful?


I love love love this frame.


and... just as a random thought...

I finally got a pic of me and hubby by his pride and joy:


This was taken with a cell phone at night... sorry :/

But I love my hubby and his ambulance.
He's proud of it :)

signature


April 13, 2010

Doggy Bone Party Invites

What do you think?

Doggy-ish enough?


I struggled with these things. I had what I wanted in my head... and never quite got it transferred to reality as I intended. lol.

I hate it when that happens.

I was thinking of the bones being fatter little bones but I kinda like how these turned out :)

I started with this:


*doggy scrapbook paper
*several sheets of tan cardstock
*keychain rings from the Dollar Store


I used my Cricut and the Mickey Mouse cartridge to cut out all the bones.

And my cricut blade is getting a little dull.
Didn't make it fun to get them out. :)

But I did.


I used Word to come up with the wording I wanted for them and printed them directly to the cardstock.
Originally I was going to use Vellum but the pattern was just too much behind it.

I cut these into strips, tore the edges and inked them. (hey, staying true to my name!)


And put them all together!

I punched a hole in the top to put the keychain through.
Do they look like little doggy collar tags?
That's what I was going for.


Anyways, these are out.
So now I've got to get onto party stuff.

Happy Tuesday!

signature


April 12, 2010

Table Turned Bench

Hey everyone... so I've been working all weekend on getting things ready to go for Ryan's party coming up soon but I thought you might actually want to see something fun.

Remember how I'm addicted to redoing furniture lately?

Well one of my projects I wanted to do was transform this little table:


This used to be the table that our tv sat on in the back living room.
I got it at an antique store for around ten bucks.
But when I did this piece I put our tv on it.

So this was just hanging out.
And we need more seating.

Hence... the bench idea.

Now granted, not a traditional bench. A bench with a drawer and a little higher than most but
it was what was in my head. :)

So here goes...


I painted the base and drawer in antique white. I primed it and everything but the wood didn't like the spray paint very well.
I had to cover up my drips well. :/

Then basically I just glazed that bottom portion.

Sorry I didn't take pictures for the next part but we were inside and it was dark :)

Me and my sister grabbed the little sucker and put a piece of foam on it.
I had to buy a piece and cut it since it was such a weird shaped top.

Then I took my beautiful fabric and stapled it up under the tabletop. It was interesting going around those little legs but it did.
Yes, it did.


Didn't it turn out beautiful?

I wish I had used a thicker piece of foam but, hey, it works.


I figure we can either use it to sit on when we need extra seating but it's firm enough still to put a trap on with some fun accessories :)

It adds color to my back living room... which I'm slowly starting to love.


I love having the drawer on it.

One more time... see how amazing the difference is with a little color?

It stands out.


I love it.

Hope you do too :)

Visit thecsiproject.com


signature


April 07, 2010

Covered Books Tutorial

Hello fantabulous bloggers!

I feel that I've been slacking lately... but I'm going to make it up. Promise.

Hopefully you'll be seeing pictures of the puppy invitation for little man's party that I've been working on up soon!

For now... I wanted to show you one of the projects for decorating my little white table from here.
I needed some fun pieces and absolutely love having books out.

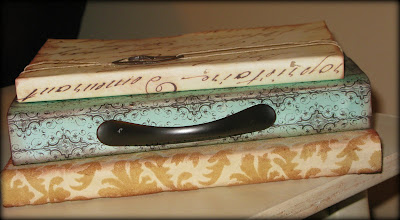
So here's what came of it:


And they're so incredibly easy to do!

Supplies:
*various books in several sizes
*Mod Podge
*scrapbook paper (Fabric would work too)
*paint (I used acrylic)
*Various hardware and other embellishments


First grab the books and paper you want to use.

My university has a table with random books on it in the English building. I loved these because they were heavy and had those gorgeous heavy paper in them. (and they smell fabulously old). I think these were printed in the fifties. I just snatched them up.
I digress though :)

Take your books and paint around all three open edges with your acrylic paint. It doesn't matter if it gets inside the pages. Hopefully these aren't reading books :)


I used three different colors to juxtapose with the paper I was using.

Then grab your paper and fold around the book:


I folded and creased around all the edge to know where to cut.
Cut it to size.
Then crease again to get the edges nice and crip around the binding.
This makes it easy to ModPodge.


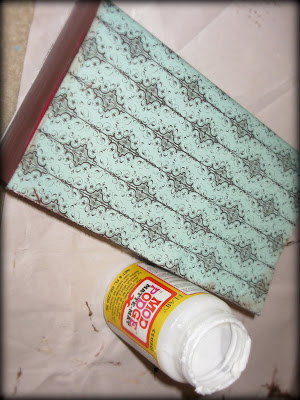
Take your ModPodge and paint it onto the cover of the book.
I started on the back cover and worked my way around the binding to the front. I didn't want any bubbles :)

After you have it on nice and smooth, brush a layer over the top.

Then add various embellishments... I added a on drawer handle on one and used some twine to add a washer to the other.


Enjoy your new fabulous books!


Aren't they fun??


I am IN LOVE with them. :)

Visit thecsiproject.com


Linking up to....


Life in the Pitts
 
I'm so happy to be featured on Life in the Pitts!
Check out all the fun things going on over there!
 
Life in the Pitts


signature